Esprit Petrol Tank Repair
Removing leaking Petrol Tanks is a big job, but you can do it!
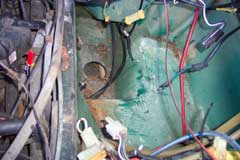
by Dave WaltersEsprits can often suffer with corroded petrol tanks which can leak. This is because you can lose the water tight seal on the rear quarter light windows. Water then gets inside and drips down onto the tanks (both or either side). The tanks have foam both on top and beneath, which will soak up the water, leaving your tank sitting on wet foam. This will soon rust a tank and will cause it to eventually leak. After 1996 the tank coating was changed, so later Esprits shouldn't have this problem. Giugiaro's are said to be easier to remove the tanks than Stevens Esprits.
However this guide is a general guide on how to remove a petrol tank from an Esprit. As usual all Esprit models are slightly different and will require some slight alterations on this theme. On some models the engine mounts need to be undone to let the engine tilt to remove the tank from one side (so fingers cross your other side goes). There are so many models we can't cover them all.
The Guide below is done on a 1990 carb'd turbo and will set you well on your way. More information can be gathered from the workshop manual and some of the specialist on this site for your model. I hope this guide does prove of some use to owners with leaking tanks.
Installation
This won't be easy, but it's doable, just give yourself plenty of time. Time taken (Lotus quote 8 hours for the carb turbo driver's side) It took about 5.5 hour to remove due to awkward tank and 4 hours to refit.
You will need the following parts:
Closed cell foam
(or just replace your existing one to anything that's better) £2.00
Fuel filter
(will be fitted about a week after installation) £8.00
Any gaskets which were damaged
(I only replaced 1 carb cross over balancing pipe) £1.00/Each
Nuts and bolts for floor
(again only if old ones are corroded) £3.00 TotalYou will need the following tools:
Selection of sockets 9, 10, 11, 13, 17, 1/2", 7/16" & 3/4".
Large and small slotted screw drivers
medium/ small philips screw driver
Craft knife
Large lever (small crow bar or large screw driver) only for awkward tanks.
Trolley jack & stands or mechanical liftAs a precaution, Disconnect Battery whilst making this repair. You may have to reset your Alarm system.

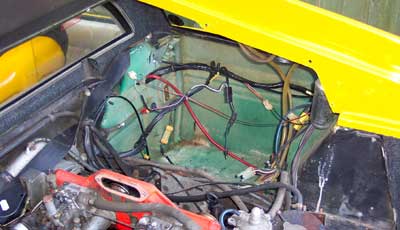
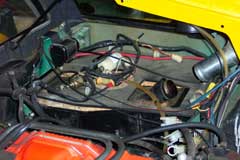
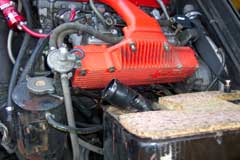
Remove, Engine cover, Carpets, Side panel cover. This is removed by a series of Philips headed screws.
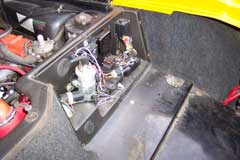
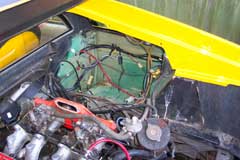
Relay cover removal. This is removed by undoing 6 x No.3 Allen Key headed screws. Undo electrical connections above fuel tank that go to relay area. Important note: Most of these are self explanatory and will only go back into their respective slots. It may be beneficial to mark these plugs as there will be some spares left over which can sometimes confuse you.
Remove the wire going from the coil to the distributor. The connector is located under the plenum. Note:- Make sure you connect this wire back. It’s an easy mistake as I discovered because when you put the boot floor back, it masks this wore that dangles over your gearbox. There isn’t another dangling wire to raise any alarm bells.
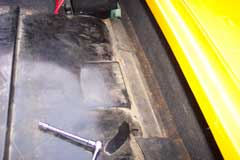
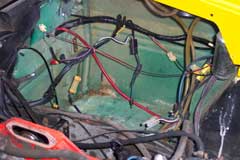
Remove 8 x bolts and four screws for floor and prise off. The bolts can give you a bit of trouble as the captive nuts usually spin in the holes. If this happens as it did to me then you have to get some mole grips snapped onto the of the captive nut underneath to prevent it from spinning. The floor is bonded in as well, so you’ll have to either use a screw drive to lift it up or a craft knife to cut the silicone around the floor. You have to unclip various electrical connections and I have one connection which was soldered so I had to cut it. Remove HT lead and rubber grommet through wall.
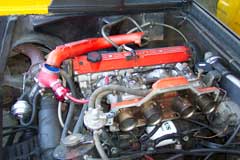
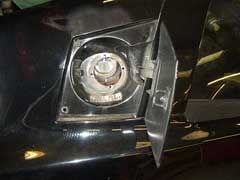
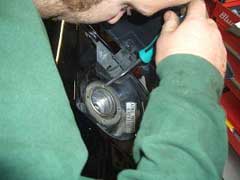
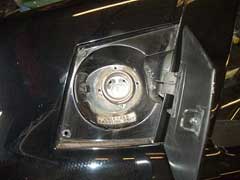
Air filter housing unit is removed by loosening 2 x 10mm headed bolts. Don’t remove these, it’s far easier just to slacken them off enough to slide the housing out. Undo air intake hose from air box to outside and remove. Remove aluminium pipe from fuel filler point. This is done by releasing the petrol flap. Undo the 4 screws that house a steel ring around the filler plug.
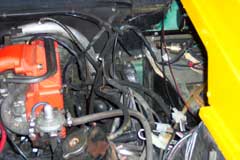
Undo fuel filler pipe and breather pipe from filler cap and tank (two jubilee clips each end). Undo three 10mm bolts at base of side engine wall. Undo two Philips headed screws at firewall end/ side wall and two screws and front. Score the base and sides with a Stanley knife as the side wall is bonded as well. Undo fuel pipe feed from carbs to petrol tank (on top of tank). Prise out rubber grommet and pull fuel pipe through side wall. Disconnect vacuum pipes (one black stiff pipe, one black rubber one with blue stripe, one black rubber one with red strip and one black rubber one with white stripe). The red strip one had to be disconnected at the carbs, under the plenum. This one will be tricky to put back.
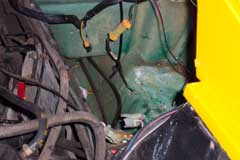
Undo three 10mm nuts holding the water header tank hind behind mounting bracket and pull away from side wall. Disconnect electrical connections from header tank. Note:- I realised after that when reinstalling the header tank there are 3 single wires but only 1 connector on the header tank. Mark the one that comes off the header tank. The other 2 must have been for the charge cooler header tank. Any electrical connections should have rubber grommets as they pass through the side wall. Push the grommet through and the plugs now fit through the holes. There is a wire connected to the rear of the panel with a rivet and a loop. This stays on the side wall when it's moved. Just unplug from the tank end. Remove electrical connectors from temperature sensors on front aluminium pipe of water system at front of bulkhead.
The side wall should prise away, you may have to ease it around from your bodywork as it's hooked underneath it. Note: Unfortunately I had an alarm wire, which passed through one of the holes of the side wall. I had to slice the sidewall from the hole to outside to allow the wire to come out of the sidewall. Remove seat belt cover (four tiny Philips headed screws which are a pain to get to). Undo seat belt bolts which as a 17mm head and pull to one side. Undo two 13mm headed bolts at fuel filler end and two 13mm headed nuts at front end. The plywood top should now come off. You may have to remove the fuel filter first.
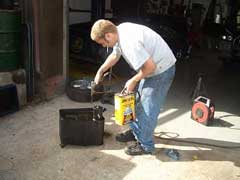
Jack you car up and remove the six slotted screws and two 11mm headed bolts holding the under tray. Remove the under tray, it may be hooked into place and might not just fall as the last screw is removed. Undo the fuel sump nut and drain the contents of your fuel tank (10mm socket I think). I didn’t have enough containers despite my tank reading empty, I managed to fill up over four containers and my drive is a mess!.
Undo fuel feed pipe at sump of tank by undoing jubilee clip and pull pipe off. Undo fuel balancing pipe (horizontal pipe that pokes through engine wall) by undoing jubilee clip. Push pipe off. Undo banjo clip bolt that secures petrol tank. This is above the fuel balancing pipe. There is also an earth strap connected to this. Use a 13mm socket.
From top of tank, offer wiring and any loose pipework around the rear of the tank to allow clear passage of tank when lifting later. Supplementary note for awkward tanks – see footnote.
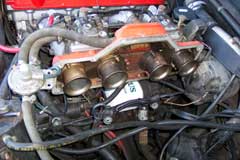
Remove top bracket that supported the plywood board at the top of the tank. This is attached to the wheel arch. Undo 2 bolts with 13mm socket. Undo the two ‘U’ shaped tubes that interconnect the carbs together. These are special hollow _” headed bolts with gaskets on. The gasket should be replaced if signs of wear or damage.
Remove top plenum which has ‘turbo’ marked on the top. This is done by loosening the jubilee clip at the rubber pipe at the turbo end, a 9mm nut from bracket and 2 long 13mm headed bolts that go right through the plenums. Undo the remainder of 10 x 13mm headed bolts from side plenum which also has ‘turbo’ marked on side. Three bolts at the bottom also secure additional wiring. Be sure to connect these on reassembly.
Remove fuel regulator from side plenum by undoing two 10mm headed bolts. There is also a pipe underneath. Put the bolts back into the plenum for safe keeping. Side plenum prizes off when all bolts have been removed. Check gasket and replace if damaged or worn.
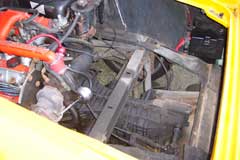
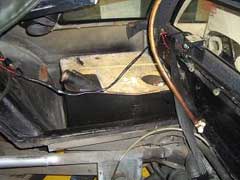
Lift out tank carefully. Note balancing pipe that is about 60mm long sticks out at a right angle and gets caught on everything on the way out, so beware.
Footnote:- My tank was about 6-10mm too big to get past the seat belt mounting bracket. This was probably due to excessive GRP being used around the wheel arches (typical Lotus). Below is a further set of instructions I used to overcome this problem. Every car is different to treat each case my it’s own merits.
From underneath use a tube or large screwdriver and wedge under the sump of the tank from the floor. Use wedges or packers to get it as high as possible to the obstruction. From inside the engine bay, prize the tank away from the engine bay wall towards the car’s outer body. This is to clear the path of the fuel balancing pipe that pokes through the engine wall. Once you have done this, put a packer there.
Now use a large screw driver or small sharp crowbar between the tank and the seat belt mounting plate to help the tank past the obstruction. Start off with a small levering action and increase until it’s clear. Make sure that use are levering against metal and not the GRP body otherwise you’ll may damage the GRP firewall.
To reinstall tank, follow instructions in reverse order.
Additional Note:- When my car had been put all back together again and was running, the revs were really high. I discovered that I had inadvertently leant on the throttle body bracket (at the front bulkhead end, next to carbs). This bracket houses two electronic devices and the bracket looks pretty strong. I think it’s made of aluminium and discovered that this bends easy. If you lean on it then the revs goes up. I simply used my hands and bent it back again thus the revs went back down to normal again.
More information
The model is 1990my carb turbo and the tank is the driver side. For the passenger side Iam led to believe that the engine mounting arm may have to be removed and the engine lowered slightly in order to get the passenger side tank out. Good news on this side is that Lotus only quote 5 hours labour for removal and refitting which is nearly half the time of the driver's side.
Tank Repair
Once your tank is out, it can be sent off to one of many companies that can repair and re-coat the tank. Tank repair cost £90. It can vary from £75-£100 depending on what is done to your tank. This will take at least a day or so (at best). So be prepared to have your Esprit off the road for a little while, while the repair is done.
Dave Walter's Verdict
Verdict is that it's a bit of an awkward job. Access to a lift and doing the job indoors would have made it a lot easier. It's labour intensive. The posative side is that it can be done by a novice because none of the engine internals are touched. It's just the case of disassembling parts and reassembling them. Tip is to make some notes on the wiring you unplug.
Hopefully this guide has covered everything but there might be the odd minor wire or vacuum pipe that needs to be noted. I had only attempted this job because I could not get in into a garage due to their workload. I also wanted to learn more about my car and this job has taught me a lot. Based on the average rate of £60/hour (which is charged by a lot of Lotus dealers), the saving is about £480+VAT. Also some garges may also put a markup on the tank repair as well.
This is without the added problems of troublesome nuts and bolts which are corroded and a tank that's bigger than the opening. This may have costed more if you get get a firm quotation prior to the job being carried out. It is an essential job that had to be resolved. It had been causing a fire hazard until now. Now I don't lose fuel. Also I was worried about the location at where the fuel was leaking, right in front of my rear tyres. This IMO is an accident wating to happen. The final verdict is that it's piece of mind.
This mod was performed by Dave Walters on his MY90 Esprit Turbo.
If you try this, feel free to e-mail me with your Verdict at admin@lotusespritworld.com
Removing Passenger Side Tank
So for anyone else who has to remove the passenger side petrol tank:
1. it took me and my father about 16 hours! - although we have little mechanical skill.2. The job would be a doddle if the engine were out. Lotus quotes about 5 hours for the passenger side - as they are adept at taking the engine completely out!
3. If it went again i would probably take it into a garage as i am nervous about lowering engines
4. As is was i removed the bolts securing the arms to the block and took off the drivers side engine arm with a jack under the block. I do not believe the engine moved by more than a couple off millimetres!
5. so got out by removing sidewall, removing fibreglass from upper edge of bodyshell - which is not seen as is coverved by plastic, and had to cut a grove in the fibreglass just above the wheel arch to allow the u shaped metal tube at the bottom end of the fuel tank to pass. This i can just fill up with fibreglass once the tank is put back in.
6. i am going to replace the foam around the tank with rubber pieces to hopefully prevent this ever happening again as the bottom of the tank is pretty rusty due to water in the foam. Rubber will not keep the water next to the surface of the tank.
David Ellis S4
LEW's SE gets tanks refurb'd at SWLC
As our engine was coming out for a rebuild, it was the perfect time to check the fuel tanks. We'd advise this if you require your engine removed for any reason. Esprit fuel tanks can corrode, especially at the bottom and leak. This is due to the sponge pad the tanks sit on getting wet from condensation or rain/road water.
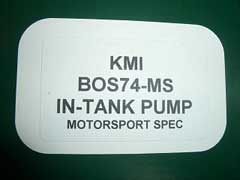
As our engine was being upgraded to S300 spec, we installed an uprated motorsport spec fuel pump to make sure our engine gets the fuel it needs. The S300 runs an uprated fuel pump as standard.
Our tanks weren't to bad, one had some corrosion, but wouldn't have leaked for a while. As our tanks were in good nick, it was decided to keep them and just clean them up and recoat them. This would protect them for years to come. Especially if we got rid of that foam they site on!
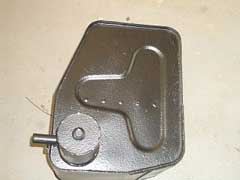
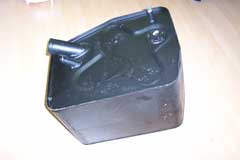
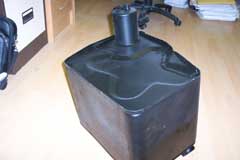
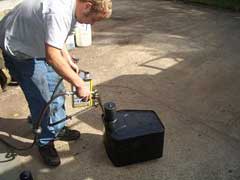
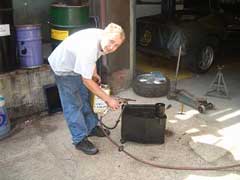
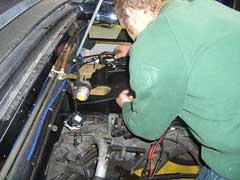
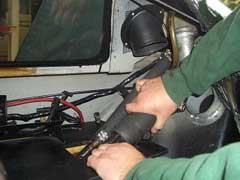
The tanks were removed once the engine was out and shot blasted to clean them up. Then vented to make sure there's no fuel was left before being soldered at the joins to add strength at the weld. They were then pressure tested to make sure they were sealed to the correct pressure and that there was no leaks.

Our tanks were then painted and under sealed to help prevent corrosion. On refitting to the Esprit, wax oiled was applied underneath for extra protection. The Sponge removed from bottom to prevent the tank from sitting on a bed of wet foam.
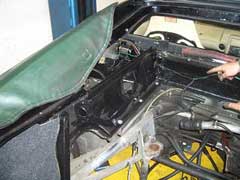


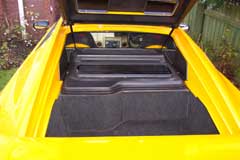
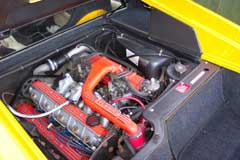
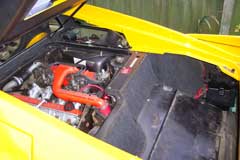
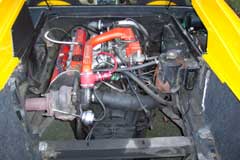
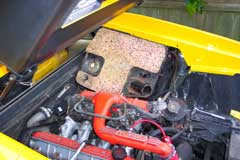
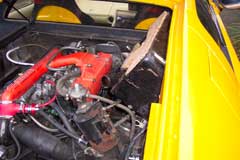
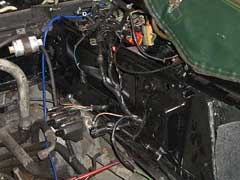
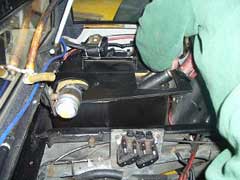
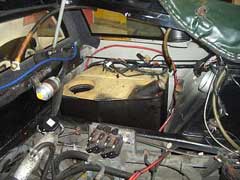
In the following pictures you can see our tanks going back in after being clean, sealed and protected. The fuel pump lives inside the tank itself.

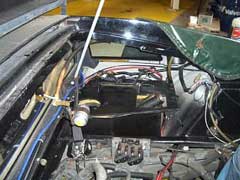
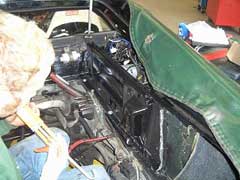
Obviously this job is better done without the engine in!
If you have any questions about what was done to our tanks, then call SWLC who undertook the work.
Now the works been completed we shouldn't have to worry out fuel leaks for a very long time.
UPDATE March 2015
This link shows my thread describing in detail 84-87 (+88 Federal) tanks modifications and constructionBest Regards
MrDangerUS
|
|