Replacing Front Lights
Corrosion takes
it toll on the Esprits eyes. Make sure you can see in the dark!
The set-up on an Esprit is basically the same as the original S1 in 1976. Using British Leyland parts, which aren't of the same standard as modern lights. The last Esprit model, the 02, uses the same lights, so this guide covers most Esprit. And will be of use to those with a slightly difference set-up.
The Esprit's front pod lights aren't one of it's strong points. The lighting is poor from the two outer main/dip headlamps and can be prone to bouncing or winking. These lights need looking after, as they are expensive to replace. This page will show you how to replace the front lights once they are beyond repair. But if you look after them you could save yourself money in the long run. Follow this guide and see what treatment your lights need
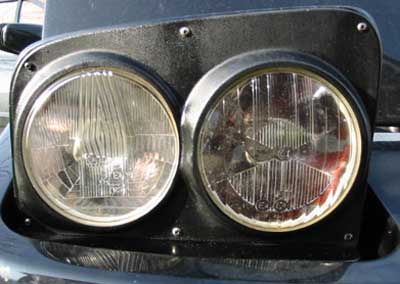
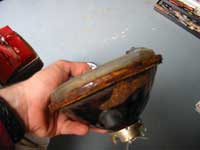
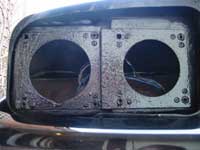
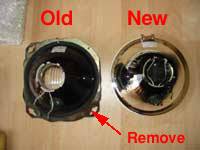
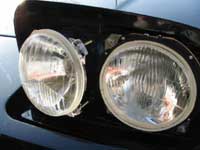
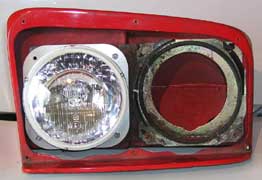
The Esprit's front lights are prone to rust, as they get covered in water and then sealed away in their pods for the rust to set in. Pods can even get blocked and fill with water. Leaving the lights to sit in a pool of dirty water to rust away. I was lucky not to have a pod full of water, but my lights had corroded badly. The shiny reflective backing had peeled off 3 of the 4 headlamps, reducing the performance of the lights. On removal of the plastic covering, I found rust to be covering almost everything.
90% of parts were damage beyond removal and refitting. So I've had to replace nearly everything. Not cheap, but here's how I did it.
|
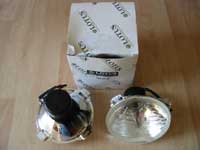
You will need the following parts: 2
x Main/Dip Headlamps |
You will need the following tools: Screwdriver |
I purchase the parts from SJ Sportscars & Lotusperformance.co.uk.


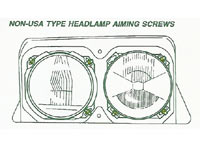
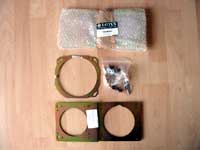
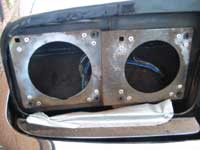
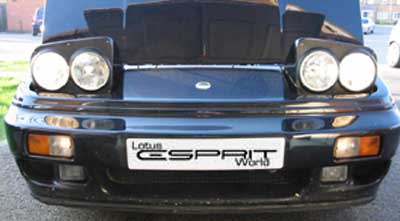
The diagram above show the Esprits light set-up. The outer lights are the main/dip, the inner are the full beam. The outer lamps can be purchased as a non-Lotus part (cheap), the inner lamps are (at present) a Lotus only part. These are expensive at around £75 each. So it you can save yours and re-use them, do. I purchased all the parts to replace the whole system. Only a couple of light screws, the plastic surround and it's screws where retain.

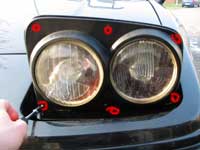
After all the parts arrived it was time to start the overhaul. Before you start, I would mark where the front tyres are and turn on the lights. Mark where they fall, so you can re-align them once the new lights are in. Next remove the relay for the front lights (under the front bonnet). This will allow the pods up, but stop the headlamp coming on. This should make it easier and cooler to remove them. Once the pods are up and you can see, remove the six screws holding the plastic surround on. Be careful with the lower ones, as these can drop into the pod hole (never to be seen again).
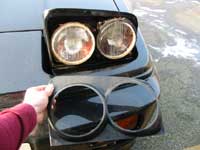
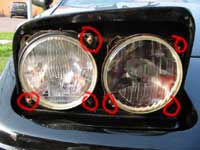
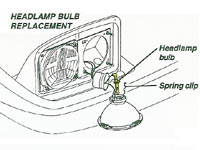
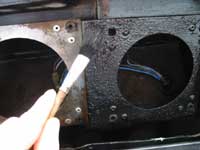
Once the surrounds off, put it somewhere safe, as these are easily broken and from what I've heard, not cheap to replace. Each lamps is held in place by 3 screws with plastic clips. These screws are also used to align the lights. Releasing the plastic clips isn't easy, especially after years of rust have been eating away at the light surround. I managed to damage quite a few of these and in the end replaced all but two of the twelve.

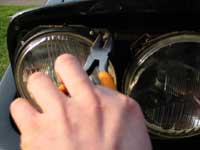
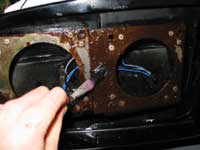
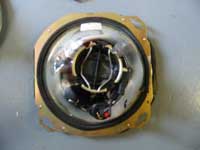
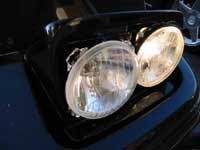
You can see the clips in the above left picture. These must be turn either way to release the headlamps. You can see how the rust has eaten away at the backing plate. Remove the headlamps carefully and put the bulbs somewhere safe. Do not touch the bulb glass with your fingers as this can reduce the life of them.

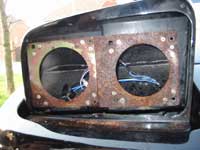
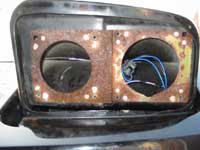
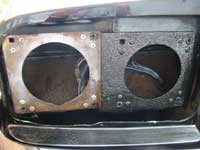
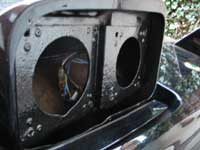
Make sure you know what was connected to what. Shouldn't be too difficult as they're male and female connectors. You can see how badly the whole lighting set-up has been affected by rust. Wasn't much left that hadn't been touched. This is the point when I realised I would be replacing the whole set-up.

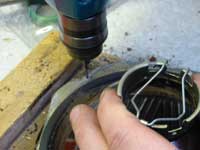
Decided quickly not to replace the backing plates (after I'd ordered them of course!), the original ones looked pretty bad, but was mostly surface rust. I used a rust remover to get some of it off, then a rust removal drill bit to finish cleaning it up. The rust remover can be bought at most DIY stores. Paint it on, wait 15 minutes and brush it off. Didn't work that well, but help remove some of the surface rust.


The Drill bit made more of an impression on the rust and removed most of it. Although it looks like there's still a lot of rust, most is just discoloured. This took quite a while, so maybe it would be worth trying to replace the plates with new ones. The rivet would need to be drilled out and the new plate re-riveted. The choice is yours!
Once the plates had been cleaned up. I used a rust paint (hammerite) to protect the plates. Never used this stuff before. It works brilliantly. Finish is really nice in my opinion and I think it will last longer than the new plates. If you really want to go to town, then put the new plates in and then coat them. Should last a life time. I gave the plates three coats, being careful not to get paint into the screw holes.
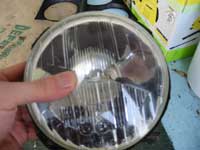
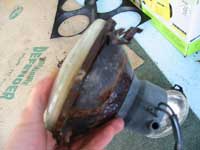
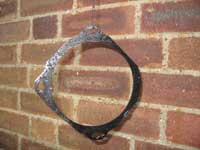
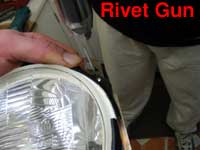
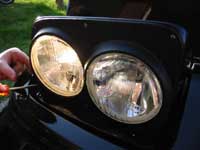
Next stop is replacing the outer headlamp surrounds. These cheaper lights don't come with the surround, so this needs to be riveted on (you could use screws or small bolts). You can see the state of the old lights. Big chunks of the reflective material had gone AWOL and rust had attack every part.

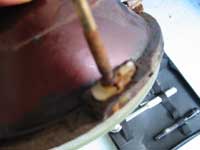
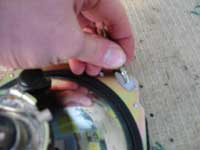
I replaced one of the outer rings and re-used another (as I was still wait for the part). You need to salvage the plastic outer ring and the rubber inner ring to attach the new surround. Firstly saw off the old rivet heads.
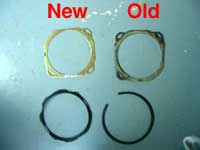
Then drill out the rivets to release the ring. You will need the three parts to re-rivet onto the new lamp. The surround, outer plastic ring and inner plastic rubber. One of the plastic rings was already broken, but still useable (as you can see in the pic above right).
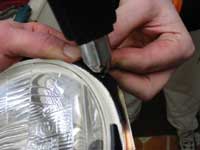
The ring I re-used, was cleaned up and coating in hammerite again. Once everything I needed was off the old lamp, it was re-riveted onto the new lamp. It's wasn't as difficult as I expected. The headlamp drops into the ring with the rubber around the inside of it. Then the plastic ring is riveted to hold everything in place. Not a great design, but easy to do.
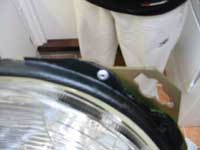
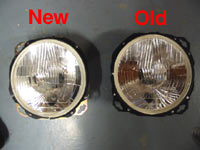
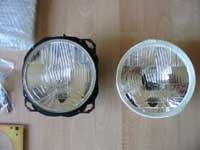
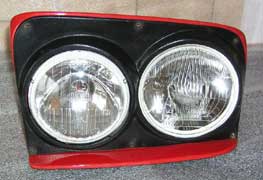
You can see above the rivets that holds the old plastic ring to the new headlamp. Massive amount of difference between the reflective qualities of the old and new lamps (middle pic). Also shown is the rear of the headlamp. You can clearly see the rubber ring, that protects the lamp from the metal frame.
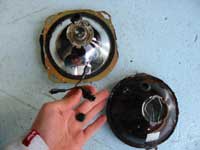
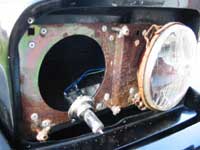
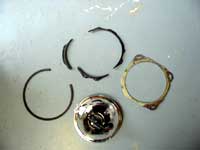
Once both the outer headlamps have been finished, it's time to move onto the easier inner headlamps. These are soured from Lotus, and come with the outer surround, bulbs and the plastic clips. The only thing you'll need to rescue from the old lamps is the grommet for the sidelight hole. This can be seen in the above left picture. Replace the wire and socket with the grommet. As you won't be running any extra lighting through there.
I found the easiest way to re-install the headlamps was to attach the clips, push in the screws (three in each lamp) and then align them up and screw them in. You need to be careful when screwing them back in, as the clips come loose as you turn the screw in. It is then difficult to re-fit if the screw is a way in. Remember to re-attach the wiring before you screw everything back in!
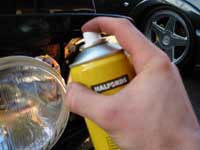
Once all the lights are back in. Replace the relay and check everything's working. You can then re-align the lights, using the marks you set up before. This is done by either screwing in or out the fixing, which redirects the beam. If you find it difficult to realign the lights, you can take the Esprit down to an MOT test bay, and get them to set the right height for you. They shouldn't charge too much for this. I would the use some Grease Spray to cover all the metal parts. This should give plenty of protection from water, but will need checking and reapplying to stop the rust. I fully covered the screws and plates in the grease. You can then refit the plastic cover and spray the screw heads with a little more grease.
You will now have a new set of front headlamps, that if cared for should last a life time. Night vision should dramatically improve, making night driving a little more fun and a lot less scary!
LEW's Verdict
LEW's verdict on this install, is it shouldn't really need doing in the first place. If you check your light (say once a year) and clean them up a little then they should never need replacing. The replacement parts are expensive and the whole process of replacing the four lights is quite time consuming. So a little care every now and then will save you time and money. As for the work, I think I've done a good job replacing the lamps, and with the aftercare, I won't be doing them again.
The lighting performance is as you would expect, as no upgrading has been done. But compared to the old damage lamps the increase will probably be enough to save my life while driving at night.
There may be a cheaper upgrade in the near future, as I know of some work going on to create cheaper replacement lamps of better quality. I'll add anything to this page, as and when it becomes available.
This mod was performed by LEW on their 1992 Esprit SE.
If you have any comments, feel free to e-mail us at admin@lotusespritworld.com
![]()
|
Headlight
Mounting Plates
|
|
 |
PNM Engineering have now produced Stainless Steel Headlight Mounting Plates to replace the rust prone mild steel originals. No more expensive that the originals, it's worth getting these corrosion fighters. See LEW's guide here to what can happen to the mild steel versions. Prices: £6.30
each AVAILABLE
AT THE E-SHOP NOW |
|
Carbon
Fibre Headlamp Surrounds
|
|
 |
Replace you're old plastic surrounds and rusty screws for this Carbon Fibre kit with plastic fittings. Fitting is easy and you'll have a warm glow knowing what you'll be flashing at a touch of a button. See the install guide here. Contact Esprit Engineering to order a pair for your Esprit. Prices: £100 AVAILABLE
AT THE E-SHOP NOW |
Lotus Cars Ltd Inner Headlamp
Update as old unit finish (Sept 06)
As the expensive convex headlamp has now gone out of production and will not be remanufactured. The boys in Lotus' Engineering department have been hard at work getting something sorted for all the Esprits who need headlamps! There's been a few independents who have come up with something similar over the past couple of years, mainly due to the cost of the lamp. But now Lotus have created an OEM part available through your local Lotus Dealership.The inner headlamp unit is now available and in stock at Lotus' Parts in Bristol. The part number is A082M5129J and is complete with fitting kit attached. The new lamp has a concave lens, the old convex. Lamp clearance in the pod is marginal and may need some local fettling. The cost is £76.14
Pictures above are of Lotus' engineering Esprit with the lamps installed. Nice to see Lotus are continuing to support Esprit owners
Full Beam Replacements
As some owners may know (and LEW are included it that), when you need to replace your headlamp (which corrode), you can get a non-lotus side lamp for £36, but the full beam lamps are 'Lotus Only' at about £80 each! Added to the fitting bolts and clips you are looking at £100 a lamp.
Lotus Performance have now come up with a replacement lamp for only £50 a side, which include lamp & adjusters. It uses "Laser Cut" Stainless adapter plates & stainless nuts & bolts. LEW has seen the kit and has had reports from an owner who has fitted this kit. It's been well design and works perfectly (actually better than the Lotus' 25 year old design). Lotus Performance are now looking at doing a version for the side light as well!
Order you kit now!
Owners Experiences
All 4 of my headlamps were looking a bit sorry for themselves, most of the silvering had burned away so time for some new ones.
have bought 4 new lamps from http://www.cars.u-net.com/lotus/esprit.htm together with some higher output silverstar bulbs. Cost & delivery was great & the adapters to fit the (cheap) Cibie lamps in place of the expensive Lotus only main beam lamps look great - yet to fit them though.
I have fitted the outer lamps & thought it worth passing on my experiences. Unlike Kato's guide on LEW, there was not too much rust so I did not need to replace everything. The correct way to remove the headlamps for replacement of the lamp or the bulb is to rotate the plastic part of the adjustor 90 degrees to release the plastic cover over the lamp. Unfortunately Lotus in their wisdom seem to have made the plastic parts of the adjustors out of a material similar to cream cheese. Any attempt to rotate them with pliers will almost certainly destroy them (OK you might get away with it on a 2004 car, but not a 1996 car).
Rather than unscrew the adjustors as suggested on LEW, its much quicker to simply drill out the 8 small rivets and then replace them with small self tapping screws. Doing this took less than 10 mins for both lamps and saves having to get the lamps re-aligned. I chose self tapping screws so that if a bulb goes in the future I can just unscrew & then pop in a new bulb. New headlamps + better bulbs have made a huge difference, before I was having to turn on the foglamps to see where I was going!
The next step is to change the relays so that under full beam all 4 lamps come on at once. Does anyone have the technical details on what relay is required (RS components part number would be ideal!). Once this is done I will fit the new inner lamps, I intended to modify the setup so that all 4 lamps act in the same way (all 4 are on at the same time, either dipped or full beam) - to do this I have chosen main/dip lamps for the inners rather than the usual mains only. I realise this may not totally comply with the rules & regulations, but provided it does not dazzle oncoming drivers I think its more important to worry about seeing where I am going than to worry about silly rules.
Alan Tong
96 Esprit S4sI recently ran across your article “Replacing Front Lights” which details replacing the front head lights light mountings with 4 stainless steel plates. After reading and reviewing the pictures from the article it appears that my 1988 Esprit is different as the lights are held in place by a metal ring that requires loosening, ( not removing but just loosening), three small philips screws. Once these screws have been loosened the metal ring can be to rotated counter clockwise to lager holes in the metal ring that allows the head of the phillips screw head to pass thru. Also my headlights are “sealed” units and do not have a replacement light element that are pictured in the article. I would like to know if your replacement will fit my 88 Esprit as my metal rings have broken do to rust issues.
Thank you,
Cliff
![]()
|
|