
Sport 300 Spoiler
Installation Guide
Esprit's have had many Spoilers sitting on their rears over the years and everyone has their favourite. Currently there seems to be two trends, with some removing them and some fitting their personal favourites to their Esprits. Alan Croft decided to fit a Sport 300 Spoiler to his 1989 Turbo. This spoiler was also used on the S4s and the early V8s. This is a very popular addition to many Esprits, with the only drawback being reduced rear visibility.
You can buy most of the different Spoilers that have graced the rear of the Esprit. Either originals off other Esprits, or copies made from a mould. Personally I would only fit a Spoiler design that has been used by Lotus.
This is Alan Crofts attempt at fitting the above spoiler (soured from S J Sportscars Ltd) to his Esprit, which is a 1989 Turbo. This should work on any of the Stevens cars not fitted with a spoiler. If you already have a spoiler and wish to change it, then you'll need to have the old holes plugged and resprayed. Which you could get done at the same time as you have the new Spoiler body coloured.
|
You will need the following parts: Spoiler |
You will need the following tools: Making
tape |

The fitting took approximately 2 hours (a lot of which was lining things up and treble checking etc. before drilling my baby)
Installation
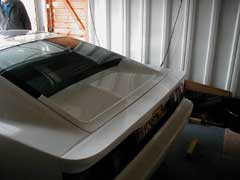
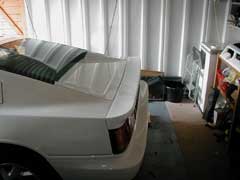
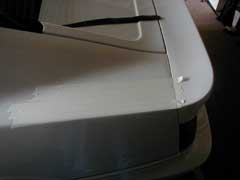
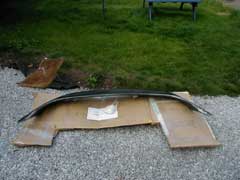
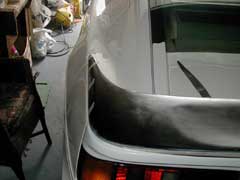
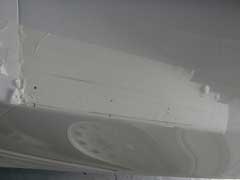
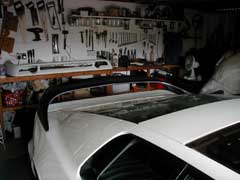
Here are some pictures of the car before I started. This is the spoiler as it comes from SJ. It will a require bit of preparation before final spraying and my local body shop did this. The first job was to put masking tape all over the area where the wing is to be fitted. This protected the paintwork while offering the spoiler for fitting and also made marking out an easier process.

The spoiler comes fitted with captive nuts embedded in the fibreglass. As can be seen from these pictures I also ran a piece of masking tape on the outside edge of the spoiler top to bottom. I then carefully marked the centre line of the hole on this piece of tape.
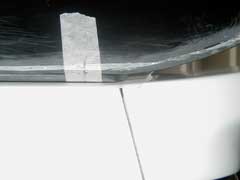
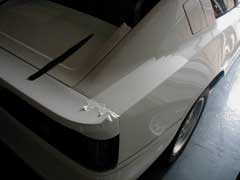
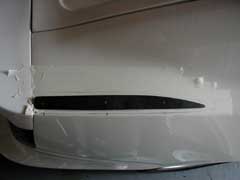
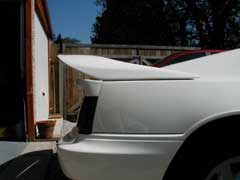
You can then offer the spoiler up to the car. Care is needed in aligning the spoiler and from the next picture you can see the position the spoiler needs to be in. There is a raised area on the base of the spoiler and this needs positioning exactly on the front edge of the gap between the rear wing and rear lip. You can also see from this picture the tape showing the position of the captive nuts. Here is the spoiler taped into position. The side-to-side fitting I did using the good old method of site of eye and feel. Some help is needed in getting the exact side position.


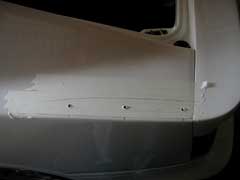
This picture also shows in greater details the tape for the captive nuts. As the centre line was previously marked on the tape this could then be copied and marked onto the rear of the car. This will allow you to see the area for the holes to be drilled in the body once the spoiler is removed. At this point I also drew around the base of the spoiler to help in both repositioning of the spoiler and to give a guide as to the edge of the spoiler for measuring the drilling area. Once this is done the spoiler can be removed.
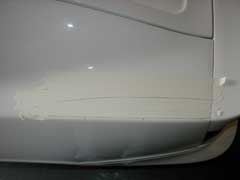
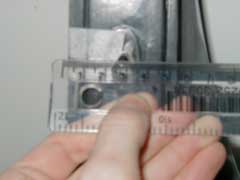
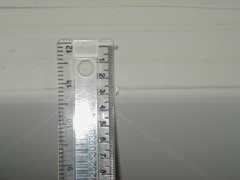
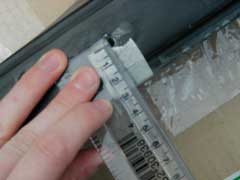
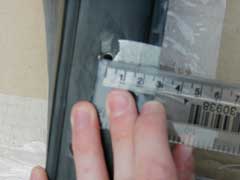
I then carefully measured the distance from the outer edge of the spoiler to the centre of the holes of the captive nuts. This measurement was then marked onto the car to show the position for the holes to be drilled. From this picture you can see the outline of the spoiler and the mark made from the tape showing the centreline of the captive nuts. Once this is done you should now have the six holes marked on the body.
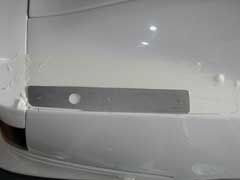
With the spoiler comes the fitting kit (you need to order this). This consists of two rubber gaskets and two metal spreader plates (one pair per side). They come pre-drilled with holes for the bolts. To double-check my measurements before attacking the car with the drill I positioned them over the holes to make sure they lined up.
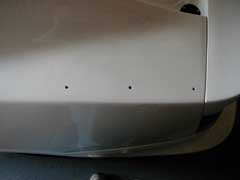
These items are handed so you do need to make sure you get them the correct way round. Once you are 100% happy with the position then you can drill the holes. I used a smaller drill bit first followed by the correct size for the bolts (the bolts came in the fitting kit). The masking tape on the body also helps to prevent any cracking of the fibreglass as you drill through.
I also placed some paper on the inside of the boot to collect to shavings from the drill. Once you are happy with the holes you can remove the masking tape. You are now ready for the fitting of the wing. Position the Rubber gaskets on the body and offer the wing up to the car. The spreader plates are then offered into position on the inside of the rear wing area (mine needed a small amount of trimming off the rear edge to get the exact fitment). Finally the bolts can be inserted and tightened finger tight. You can then check all the alignments of the spoiler before final tightening. I needed to slightly enlarge a couple of the holes in the body to tweak the alignment. Once you are happy with the alignment the bolts can all be carefully tightened up.
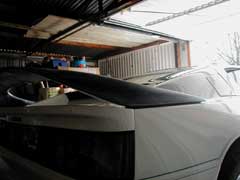
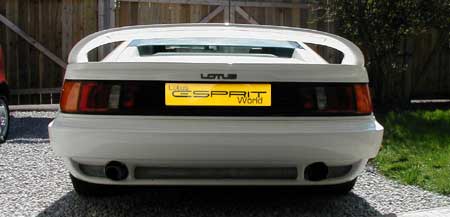
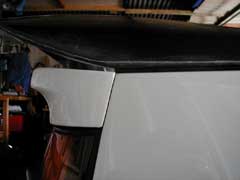
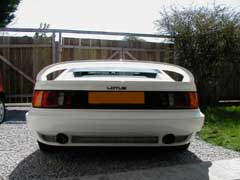
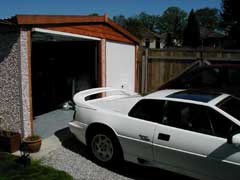
Here are the pictures of the final position. The spoiler was then taken off and taken to the body shop for prepping and painting. Here are the pictures of the finished article. In my opinion this is the best spoiler that was fitted to the Esprit and the only downside to fitting it is the virtual removal of any rear vision you might have had!!
LEW's Verdict
As we didn't actually do this install, LEW's Verdict is only an opinion of what you see above. We have seen Alan's Esprit at Stoneleigh with the new wing on, so we have seen what it looks like in the flesh. Firstly it looks great on Alan's Esprit. We think you can see that from the pictures alone. Installation doesn't look particularly difficult, but care must be taken with the measurements before any drilling. Also remember to get some idea of the cost of painting the Spoiler as this will increase the overall cost after purchasing the Spoiler.
As some of you may know, weI've removed the Spoiler off LEW's Esprit, so maybe this install isn't one I should be commenting on. But I think if I was to add another spoiler, I would seriously consider doing the same as Alan. The rear view is awesome!
This mod was performed & supplied by Alan Croft on his 1989 Esprit Turbo.
![]()
Feel free to e-mail me with your opinion on this guide and I can add it to this page. kato@lotusespritworld.com
|
|