

Crankcase Breather Filter
High performance engines and race cars are routinely fitted with catch tanks to collect oil mist or breather filters on the breather hose to protect the system. Oil mist comes from the crankcase that is produced by pressurisation of the sump. On the Esprit there is a oil/air separator (Green plastic thing, see below) which is supposed to trap all the oil and feed it back to the sump. However, it does not work perfectly and the exit of this separator is fed back in to the air box. The result is that oil mist is fed back into the air intake. You will see oil collecting in the the turbo intake trunking if you have a look. If excessive oil mist/vapour (like on a worn engine) is present in the air intake the effect is to dramatically increase the potential for engine knock by lowering the effective octane level of the air/fuel mixture.
If the Knock sensor detects any engine detonation "pinking" then it will retard your ignition timing to prevent further detonation. In extreme conditions it will also limit boost to prevent you blowing up your engine. Oil is not as volatile as petrol and the effect is the explosion that pushes the engines piston down is not as violent which again equals less power. We also think oil mist also increases the Exhaust Gas Temperature (EGT) which is also not good.
The reason the hose is fed back into the airbox is that manufacturers aren't allow to vent oil mist onto the road by law. They must route it back into the system, as if every car on the road vented a tiny amount of oil we'd soon be sliding around the roads. Once the car is in our hands we can changes this to further protect our engines.
One solution is to fit an oil mist catch pot and blank of the hole in the air box. Another is to let the breather hose hang down into the engine bay and release the mist out onto the road and around the lower engine bay. You will still need to block the hole in the airbox. We use the new carbon fibre airbox which has had this hole deleted. This will stop the mist finding it's way back into the engine. Due to the system having a depression at small throttle openings air and dirt from the road could be sucked back into the hose if the Breather Filter is defective. This guide will show you how to vent the hose out and fit a filter to stop anything entering the system.
We will also show you how to replace both the non-return valve and filter that run on the breather hose. This was done as a matter of course as these parts are now very old.
From Lotus:
The crankcase breather is designed to vent excess crankcase gases (pressure)
to the inlet system via the airbox.
This pipe is connected to the filtered air side of the airbox.
The system also has a small bore pipe that sucks fumes back to the inlet
manifold when the engine is at idle (small throttle opening).
This pipe is fitted with a one way valve to stop boost pressure escaping
during normal engine operating conditions (wider throttle opening).
By disconnecting the breather pipe from the airbox and routing it out low in the engine bay should not cause any problem. However at idle it is possible to suck in some air from the vent pipe as well as crankcase gases so theoretically you could suck in some debris. Having a filter on the end of the pipe would guarantee that it could never suck in anything other than clean air.
Installation
This is quite a small job with if only fitting the filter and shouldn't take more than 1 hours.
|
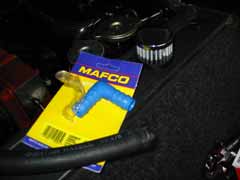
You will need the following parts: K&N Crankcase Breather Filter (K/N62-1360) Optional: |
You will need the following tools: Sockets
or spanners |
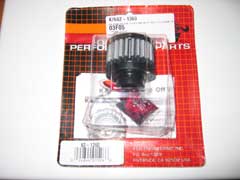
We order our parts from Christopher Neils and Demon Tweeks. We used genuine Lotus parts for the breather hose and an aftermarket (non-road use) K&N crankcase breather filter, which costs around £18.
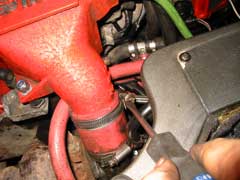
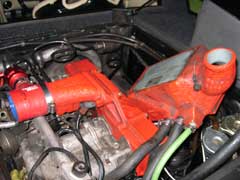
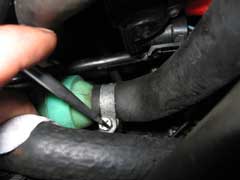
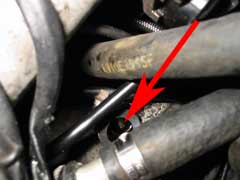
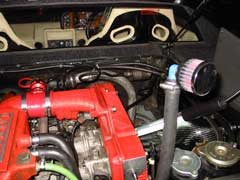
The breather hose is connected under the airbox. Undo the jubilee clip and pull the hose off. You're likely to find a build up of oil in the hose, that's making it's way into your induction system. Above right is the pipe on the airbox that the hose connects to. This will need to be blocked off. Originally we used a rubber cap, but we now have a carbon airbox which has this connection deleted, so it's not a problem.
If you're not replacing the non-return valve and filter, then you can skip this part. We are going to remove the chargecooler to make it easy to get at the parts we are replacing. We also replaced a rubber chargecooler mounting that was broken.
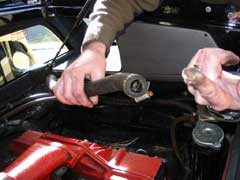
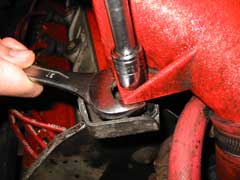
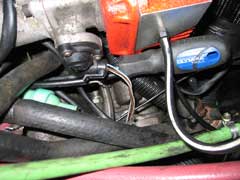
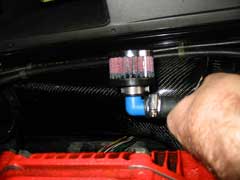
To remove the chargecooler, you need to remove the sensor at the back of the cooler. Then undo the mounting at the back of the cooler, this requires a 13mm + 21mm spanner (see below). At the front loosen the jubilee clip that connects the cooler to the turbo.

You can then remove the last bolt holding the chargecooler on. Ours was broken and was a pain to take off. The rubber split, which meant we had to take both top and bottom pieces off. A separate guide will be produced for this.
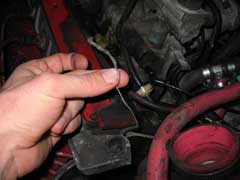
There is also an attachment under the bottom nut which attaches the mount to the cooler. Ours was broken! We fixed this at the same time as the mounting bolt.
You can see for the picture above right, how the mounting bolt works. The rubber in the middle doesn't have the bolt going through it!
Once the fixings are removed you can simply (and carefully) lift the chargecooler off the top of the engine. Make sure no wires or cables are in the way. You don't need to drain the system and can leave everything attached. Now to sort out the breather hose!
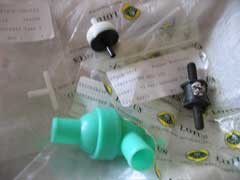
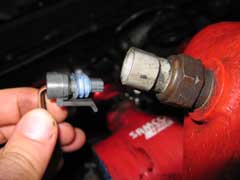
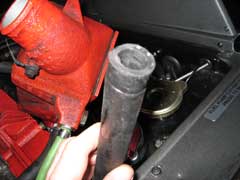
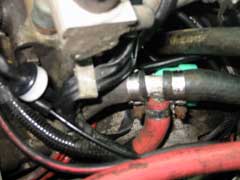
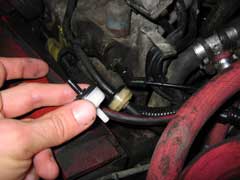
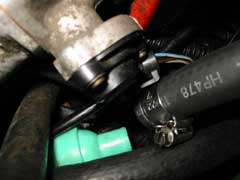
You should now be able to see the non-return valve (above left). This black/white coloured valve sit directly under the chargecooler. The air/oil separator (green filter) can be found to the right of the valve under the chargecooler pipes. You can follow the valve pipe to the filter pipe, which leads onto the breather hose.
To remove the filter, loosen the jubilee clip attached to the right of the filter. Once loosened you should be able to pull off the breather hose that was attached to the airbox.
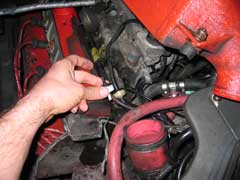
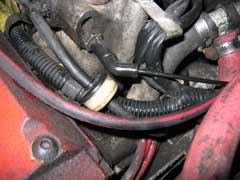
To remove the filter from the Esprit, you'll need to loosen the jubilee clip that holds the filter on to the sump return. You can see the angle you'll need to get your screw driver in at! Once loosened you can pull off the pipe that leads left to the valve and remove the filter.
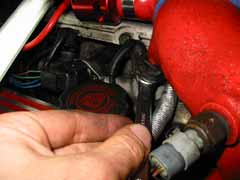
Now to replace both the valve and filter. The valve should be easy. Just pull off each pipe and replace with new valve. Remember the white side to the airbox and black side to the engine.
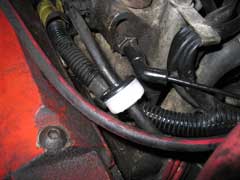
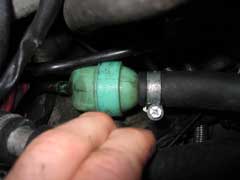
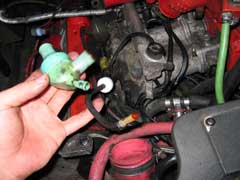
You can see a close-up above of the non-return valve. All the parts taken off the Esprit were sent back to Lotus for them to check over. It was found that the filter was still fully functional, but the valve was no longer working.
Now for the more difficult filter. From the middle pic above you can see where it should bit. Push on the pipe from the non-return valve first and feed the filter in through the other pipes. You should now be able to attached it in the same way you removed it. Tightening up the jubilee clip. Once that's done you can replace the hose that runs to the airbox. Not that difficult really.
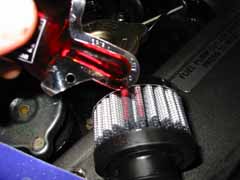
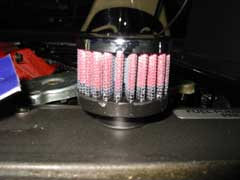
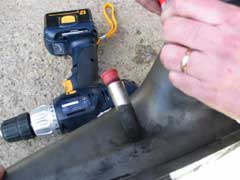
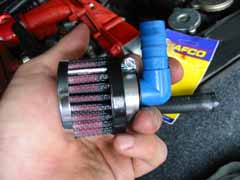
Now for what we came for! Fitting the crankcase breather filter. We chose a lovely looking filter from K&N, which matches nicely with our air filter. Unfortunately you'll see neither, but we still like them to look nice! You need to oil the filter before using it. Letting the oil soak in for 20 minutes and making sure there's not white patches left.
To connect the filter 19mm to the pipe 19mm, which purchase a Hose connection for our local Halfords store for £1.99. They only had L-pieces, but we'd have probably chosen that over a straight piece any how!
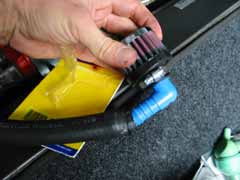
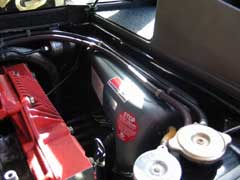
You can use the jubilee clips that were on the hose originally. We replaced them will new ones. Attach the filter to the connector and then to the hose, making sure the hose is secure. How you have a complete system. Just need to locate it somewhere.

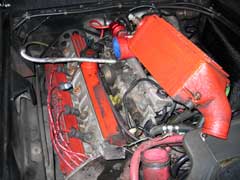
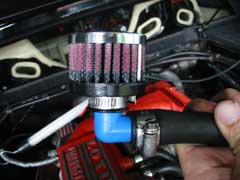
We liked the look of the filter and wanted to mount it somewhere nice! But unfortunately it's likely to blow out oil mist during it's time in the car and we don't want that all over the engine! Best place to locate it is down where the airbox hose goes, near the clutch slave cylinder. Weaved in and out of the existing pipe work in that area it's held securely and isn't located anywhere where a little oil mist is going to be a problem. You can use some cable ties if you want to make it extra secure.
Verdict
Fitting the breather filter wasn't very difficult and the install looks good. We decided to replace the other parts in the system, but you don't have to. We originally fitted a catch tank, which was removed when we fitted our carbon fibre airbox. We couldn't put the system back to the way it was, as the new airbox didn't have a connection for the breather hose. We could have just let the hose hang and run the small risk of it sucking up some dirt. But why do that when fitting a filter is quick, simple and not too expensive. We now have a beautiful carbon airbox and a breather hose that works, but returns no oil to the system where it could cause damage. Another modification we are very happy with.
![]()
This mod was performed by LEW on their 1992 SE
If you have any comments, feel free to e-mail me with at admin@lotusespritworld.com
|
|