
Esprit Front Brake Upgrade
The installation guide is designed to show you how to replace the brakes on a Pre-Brembo equipped Esprit. This will include replacing the discs, pads, calipers and hoses. Due to the discs being mounted behind the hubs, it will also show you how to remove the hub and wheel bearings.
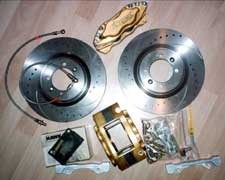
The Esprit brake upgrade shown here uses a kit supplied by PNM Engineering. The kit contains 2x Ventilated Brake Discs (plain/grooved/drilled&grooved), 2x HiSpec 4 pot Calipers, 2 x braided brake hoses, 2x alloy caliper mounting brackets, assorted nuts, washers & bolts and one small knife. Brake pads aren't part of the kit, as you can choose which type you want. We've gone for the Hawk pads which should perform well with the grooved & drilled discs.
Also see the larger 6-pot versions here.
The balance of the brakes will be affected by increasing the efficiency of the fronts alone. We've did the maximum possible without replacing the calipers to the rears to try and balance the system, but eventually upgraded the rears as well here to V8 spec. This installation can also be used as a guide on how to replace the standard parts.
Anything shown below is only a guide. You take the work on at your own risk and Lotus Esprit World or PNM Engineering take no liability for anything you do on your own Esprit. If in doubt leave it to a professional.
Installation
This is quite a large job and will take a minimum of 6 hours. It took me 3 days on my own, but I think I could do it now in about 8 hours with the help of this guide.
| Parts supplied by: |
 |
|
You will need the following parts: Brake
Kit |
You will need the following tools: 10,11,
13, 14, 15, 17, 19, 30mm socket/spanners |
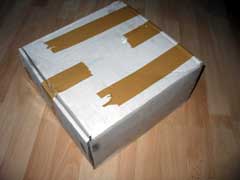
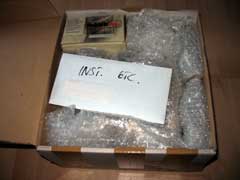
The kit arrived in a much smaller box than we imagined. Check all the contents before starting the job.
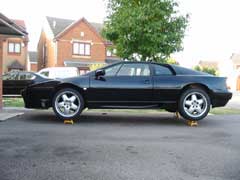
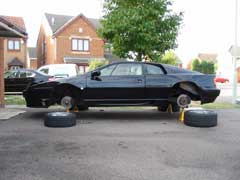
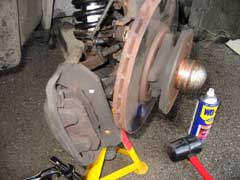
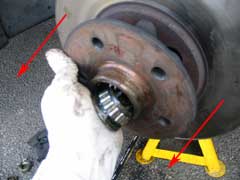
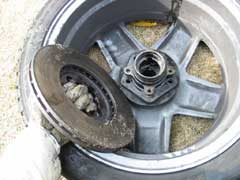
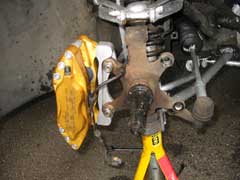
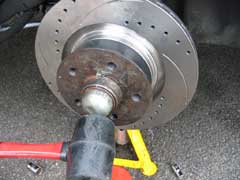
To change the brakes your going to need to jack the car up and place it on axle stands for safety. As you're going to have to bleed the brake system, you're going to need all four wheels off at some point. We did it all at once, which is quicker and easier. See the standard brakes on the right.
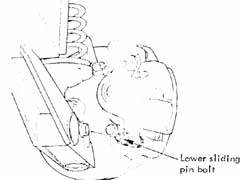
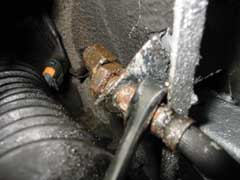
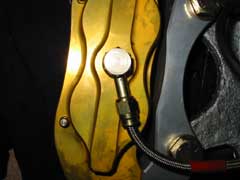
First thing to do is to remove the caliper. There's a small sliding pin bolt behind the caliper which allows easier access to the mounting bolts. I didn't find this until afterwards, so it is possible to remove the caliper without removing this.
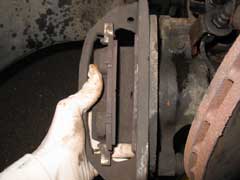
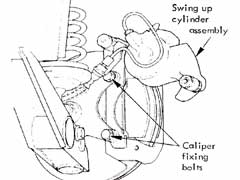
Remove the two bolts holding the caliper on. Once these have been removed you should be able to slide the caliper off the disc. Some WD40 will help if your bolts are corroded. Remember not to get any on the pads or disc if your not replacing them.
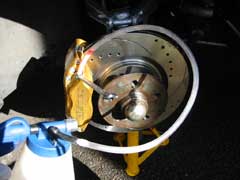
You can now empty the brake fluid from the system if you are changing the hoses and calipers. You'll find a 10mm bleed nipple on the top of each caliper. Have a container underneath and slowly loosen the nipple until the fluid starts to come out. Let is drain while you continue. Be careful with brake fluid as it will damage any paintwork, so remember to clean up as you go.
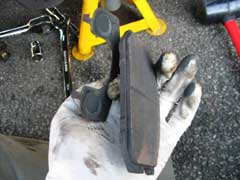
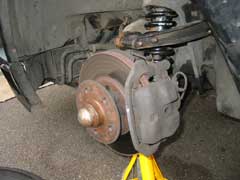
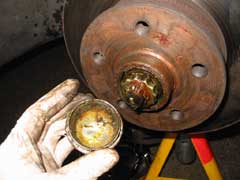
My pads were nearly at the end of there life as you can see. The piece on the right is the clip that holds them in. Once the caliper is removed from the mounting, it will still be connected to the brake hose. I just laid mine down out of the way, you may wish to tie your up for safety.
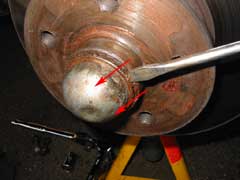
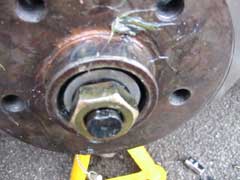
Next it's time to remove the hub. The Disc is mounted behind the hub, so you'll need to remove the whole thing to get the old disc off. Slip a flathead screwdriver on the lip of the cover and lightly tap it with a mallet. This will ease the cover out. You should be able to move the screw driver around edging the cover off.
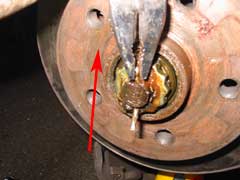
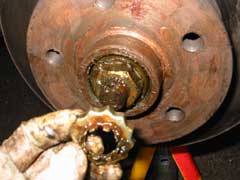
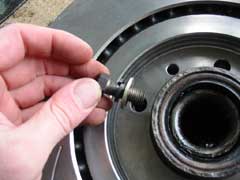
Once the covers off, you can remove the split-pin (you'll have two new ones in the kit). Straighten the ends with some pliers and pull it out from the top. Next is the lock cap which stops the nut from turning. This should come straight off.
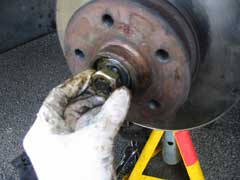
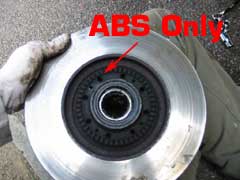
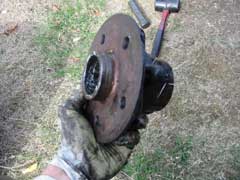
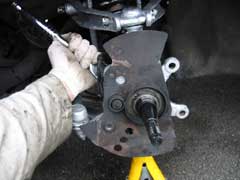
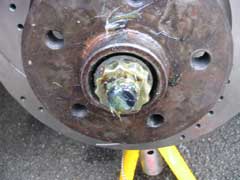
The 30mm nut is only done up hand tight and should come off really easily. The hub will now be free, but be careful of the thrust washer and outer bearing, as these are likely to drop out of the hub as it moves. Pull the hub off and turn it over. If you have ABS, you'll have a disc on the back of the hub, which covers the bolts to remove the disc
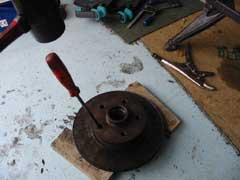
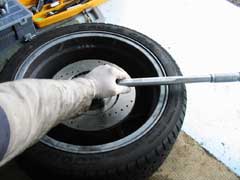
To remove this, just place a screwdriver through the hub and onto the disc. Lightly tap it with a mallet to remove it, allowing you to reach the bolts. The bolts are torqued tight, so the safest way to remove them is to rebolt the hub to a wheel, holding the hub securely. You can then undo the bolts without any chance of damaging the hub on a vice. You'll need to keep the bolts to use with the new discs.
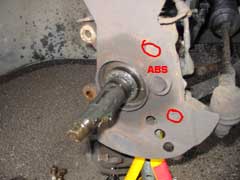
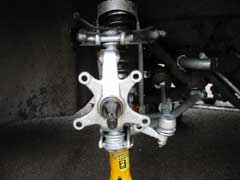
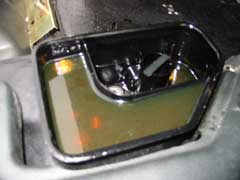
You now have your hub ready to attach the new disc to. Meanwhile, if you don't have ABS, remove the heatshield, which is held on by two bolts. If you have ABS you'll see the sensor plugged into the rear of the shield.
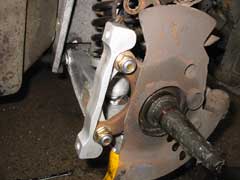
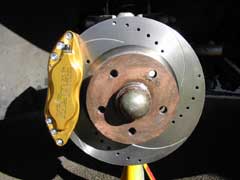
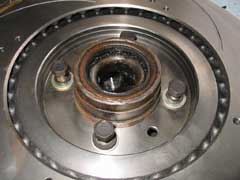
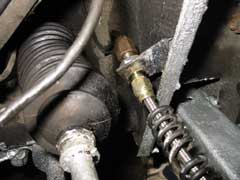
This is how the caliper attaches to a non-ABS equipped Esprit. The next picture shows it with the heat shield still attached. This is the best time to attach the mounting bracket (although I did it later). Clean up the fixing points, clearing any dirt or rust away, leaving a flat surface. With the flat surface of the bracket facing away from you, pass the supplied bolt (copperslipped) and washer through from behind. The fix with the nylon washer. Torquing to 60lb ft.
If your Esprit has ABS you will need to bend the edges of the shield inwards to stop it touching the new larger disc. I did this by removing the shield and bending it on a bench. I took advantage of the brakes being off to paint my mounting and suspension with a rust proof paints.
Replace the heatshield afterwards (those without ABS can leave it off, this will aid cooling). You may wish to mount the new disc first to see how much movement you'll need on the shield.
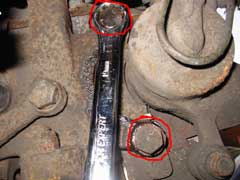
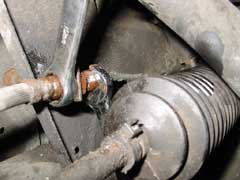
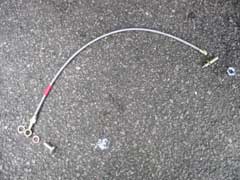
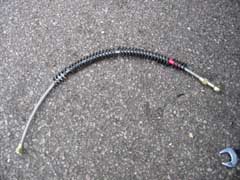
You can now remove your brake hoses. Make sure you clean up any brake fluid before you start. As I was replacing the calipers I cut the hoses off to make it easier to remove. You can then undo the fixings. You'll need a 17mm, 15mm and 13mm spanner to undo the hose. These may be corroded, so some WD40 will help. If you still have trouble you can heat (only gently) the nuts up to help loosen them. Remember that brake fluid is flammable.
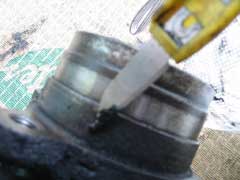

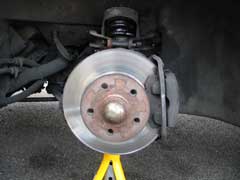
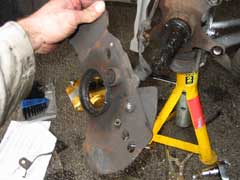
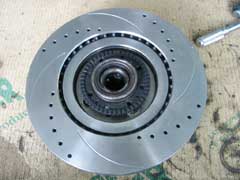
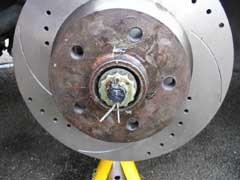
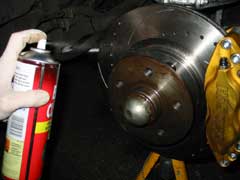
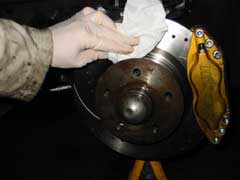
Before replacing the disc, you'll need to clean the hub up as when it wasn't touching the old disc, it will have corroded. The new disc will not fit until this corrosion is cleaned off. Use the knife supplied to scrape any rust and dirt to expose a clean metal surface. You should do this whenever replacing discs. Once this is done you should be able to fit the new disc on the hub as shown above.
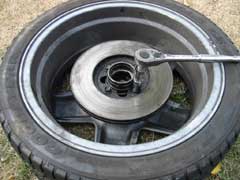
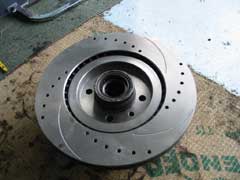
To fix the disc to the hub, use the old bolts with the new washers supplied. Place the spring washer inbetween the new M10 washer and the bolt, as shown above. Turn the hub on the disc in the direction of wheel travel to help seat it properly. You can now torque up the huts to 50lb ft. Again I bolted the hub to the wheel to hold it while torquing it up.
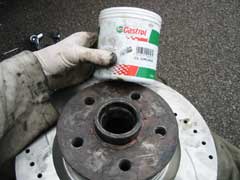
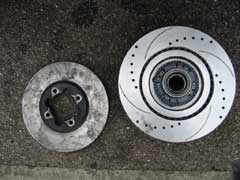
If you have ABS you'll need to replace the disc you took off earlier. This can be pushed on the then gently knocked into place. I used the rubber handle of a hammer. You now need to replace the hub (with new disc) back onto the car. You'll need to grease up the bearing before refitting. I used some Castrol grease from Halfords. Pack the rear of the hub with new grease after removing the old black grease. You can see the new and old discs together, the new disc does look a little larger than it should as it's sitting on the hub.
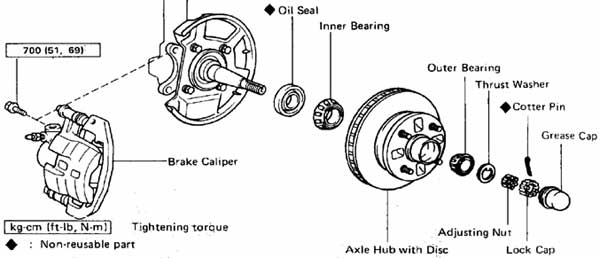
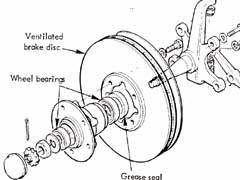
The diagram above shows how everything goes back together.


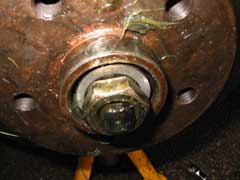
Slide the hub back on, making sure the disc rotates freely. Clean (wipe over) and re-grease the bearing and replace. Followed by the thrust waster and finally the nut.
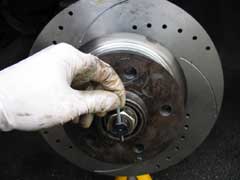
Torque the 30mm nut upto 26lb ft to seat it in the hub, then back off & adjust up until bearing play has just gone. Fit locking collar & new split pin provided. Check that the disc is central and disc run out is not more than .003". Do not tighten the nut fully as this will put too much pressure on it and it will fail.
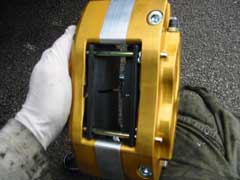
Once the split pin is in, you can gently knock the cover back on. Now it's time to fit those new calipers. Fit your chosen pads to the calipers, this is done via a large pin and clip (see above right).
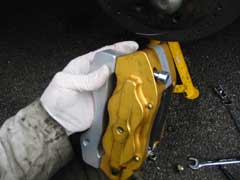
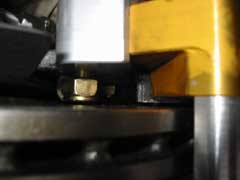
Above is the rear view of mounting the brackets. It's probably easier to fit the mountings before you replace the hub (see before). Use the allen head screws and spring washers supplied to fix the caliper to the mounting bracket, with the bleed nipples pointing upwards. Torque to 44lb ft
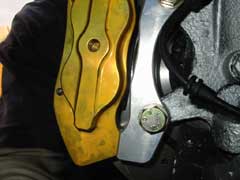
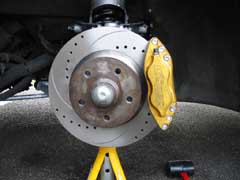
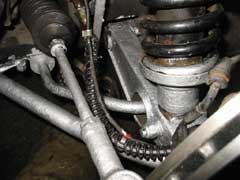
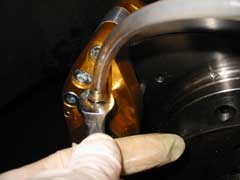
This is a rear shot of the caliper and mounting bracket, it also shows where the hose will attach. With the disc and caliper now fitted (left hand side shown), there's only the hoses left to fit.
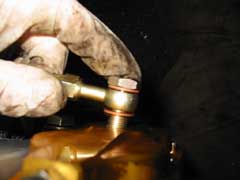
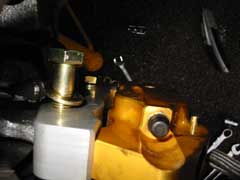
I used the old covering from the plastic hoses for extra protection and to hold the ABS wires to it. Fix the hose to the brake pipes and then to the rear of the caliper. Use the copper washers supplied as shown. Tighten to 15lb ft.
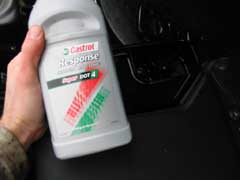
You can see how the hoses attach from the two pictures above. I used Castrol Fast Response Dot 4 brake fluid to refill the system. Again be extra careful when handling brake fluid.
Fill up the brake master cylinder with new fluid. Then using a bleeding kit (I used a draper kit), bleed all four calipers. You will also need to bleed the two nipples on the master cylinder if you are running the Delco system. This system is a pressurised, and you will need to follow the workshop procedure for bleeding. Check the fluid doesn't run out as you go. The rear caliper nipples are 10mm, the new calipers are 11mm. The new calipers have two bleed nipples each, which both need bleeding.
Check all fixings, and check for fouling lock to lock. You may need to cable tie the brake line to the redundant lungs. Now clean the brakes with brake cleaner and wipe down. Your brakes now need bedding in according to the pad manufacturers specifications. Then you're ready to STOP!
Verdict
We will follow this install with a review of the brake upgrade once we've had time to test it. LEW's verdict on the installation is as follows. Although the process looks pretty simple. It took a lot longer than we thought it would. None of it is really taxing if you have an idea of what you are doing. You'll need the right tools before you start and plenty of time. Following this guide should making to job a lot easier than we found it and we would be happy to do the job again now and enjoyed working on the Esprit.
That said, you will have to decide if you wish to undertake this work or whether you feel it would be best left to a professional. Remember your brakes are a very important part of your car and work should not be undertaken if you are not capable.
This installation is to show you how to change the front brakes on an Esprit. It also shows you what we've done to our Esprit and what's available on the market. These modifications aren't always the right thing to do for every owner. Think carefully before deciding to modify your Esprit.
Review
After bedding in the brakes, which takes quite a while as the pads (hawk) are a hard material, we could really start to see the difference this upgrade kit makes to the Esprit's braking ability. Note: They do take a long time to bed in. They do just keep getting better and better. As the hydraulic system is unchanged you will not notice a major change in the feel of the pedal. You will however feel the extra grip the kit provides. It's difficult to explain, but you'll feel the difference! This kit won't turn your Esprit's brakes into the over-servo'd systems you tend to get on modern cars, where the slighest touch will give you 50% of your braking ability. It will provide you with strong powerful progressive brakes that will give you more confidence on the road. Also you'll notice no fade whatsoever (not as yet track tested).
We're very happy with this kit. It's not the most powerful you can buy, but as for stopping-per-pound, it's worth every penny. More powerful kits will require a major upgrade to your rear brakes, whereas this kit gives you more powerful stopping power without unbalancing the car. This kit has been fitted to other Esprits with very positive owner feedback.
Don't forget how good this kit looks as well compared to the tiny old calipers and discs and it will fit under 15" front wheels. For just over £500 this is money very well spent. So unless you've got £1,500+ to spend, this is the kit for all pre-brembo Esprits.
And on a compatibility note, both the Front and rear kit will fit under the 16" Rears and 15" Front SE alloy wheels.
Pre-Brembo Esprits are too fast not to upgrade the brakes!
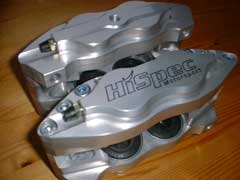
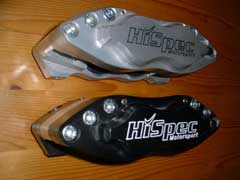
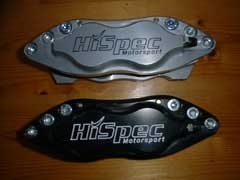
Calipers now available in Gold, Silver and Black
Prices
There are 3 kits available for the Toyota equipped Esprits. All kits are the same, except the Disc. You can choose between Plain discs, Slotted discs (which have grooves in them) or Drilled and Slotted (which have grooves and holes), which is the discs shown and tested by Lotus Esprit World.
Prices do not include brakes pads, of which there are different choices. Prices range between £20 and £80 depending on what you are after. PNM can quote you and help you decide which ones will suit your needs most.
| PNMJ9982K | Plain Disc Kit | £493.90+VAT |
| PNMJ9982GK | Slotted Disc Kit | £509.90+VAT |
| PNMJ9982DK | Drilled and slotted Disc Kit (as above) | £527.90+VAT |
PNM Engineering also produce a similar kit for pre Toyota equipped Esprits. This kit covers Esprits produced from 1981-1985.
PNMJ8982K Plain Disc Kit £405.50+VAT PNMJ8982GK Slotted Disc Kit £425.50+VAT
Prices correct at time of article. Please Call for update prices
![]()
This mod was performed by LEW on their 1992 SE
If you have any comments, feel free to e-mail LEW at admin@lotusespritworld.com
|
|
