Turbo
Timer
Digital Boost Gauge for the Esprit
After all the chipping that's been going on, and Esprit owners lust for more power. We've been looking into Boost Gauges and Turbo Timers. Currently V8's, GT3's and Sport 350's don't have a boost gauge. The Esprit models that do, the gauge only goes up to 1 bar, and isn't very accurate. With some of the chips that are available through the site, running up to 1.25 bar of boost, we really do need an accurate boost gauge. Especially with a few sticking wastegate floating around.
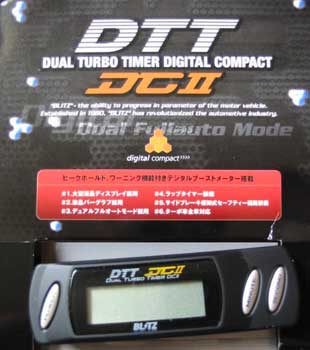
We've looked into what's on the market and have found the Blitz DTT DC Turbo Timer (below, also in black) would be just perfect for the Esprit. It's basically designed to let your engine run for a few minutes after the ignition has been turned off, to cool your turbo down. Which is a good idea in itself. It also has a built in Boost gauge among other features (see below).
We have done a deal with a supplier to purchase one of these for a slightly reduced price (couldn't get a free one), which we have used to do this install guide (mornings work) and then review.
We think this is a must for anybody running anything over chip #3 as chip #4 and above all increase boost above 1bar. For those owners without any type of gauge, then for safety, I think this product will be worth the money without running a chip.
We'll review the product honestly, as we'll be running it in LEW's Esprit, and won't advise you to buy one if we're not happy with ours, as we make no money from any sales. See the install guide below and read the review.
|
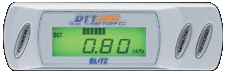
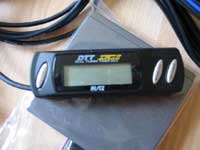
DC TURBO TIMERS There are two types of turbo timer available from Blitz; the FAT DC and the Dual DC. They come in two parts, a control unit, and a front panel, which means the display is very small and easy to mount. The Blitz turbo timers are also fully automatic, working out the correct length of time your engine should be left idling to give the turbo bearings time to cool down, based on the way the car has been driven (the engine speed is calculated by measuring the small fluctuations in supply voltage the engine produces as it runs). The FATT DC features a built in lap timer, in-car temperature display, battery voltage and digital rev-counter. The Dual DC also includes a boost pressure display, peak boost, and over boost warning. Both timers are available in Silver or Black. |
As always we will be performing this on LEW's 1992 Esprit SE. This install may differ slightly for those who own later Esprits. We will hopefully be fitting one of these into a V8 soon (new style interior) and will add to this guide (see below).
See the Turbo Timer Review here
|
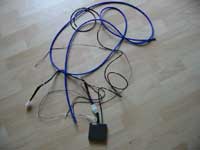
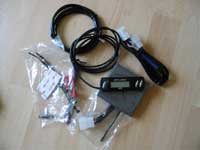
You will need the following parts: Turbo
Timer |
You will need the following tools: Screwdriver |
Installation

The kit that comes with the TurboTimer is brilliant except for one thing! The Boost Hose is long enough for front engined cars, not quite enough for mid-engined cars. So I ordered 3 meters of 3mm Boost Hose from Demon Tweeks (Tel: 01978 664466) costing £15. This increase in cost is a pain, but for the privilege of owning a mid-engined car, I'm happy to fork out. The new hose is a lot thicker than the hose supplied, so you could try 2.5mm if they've got some, but works as well (if not better), but is a little harder to run through the Esprit. To start the install, I ran the hose from the engine bay through to the footwell.
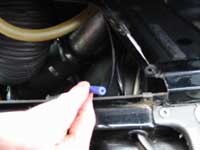

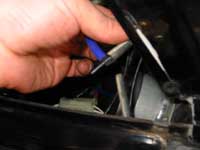
Start with the hose at the back of the same compartment that we did the ram-air and chip conversions on. This is where it will connect to the hose running from the engine to give us our boost reading. Feed the hose behind the piping and round behind the ECU. We are going to take the hose through to the cabin via the seatbelt.
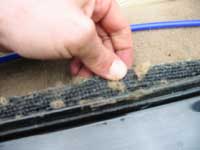
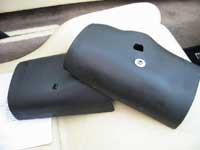
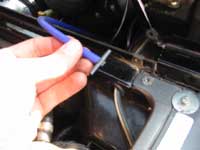
Remove the 4 screws that hold the plastic casing covering the seatbelt. Be careful as the bottom two are plastic.
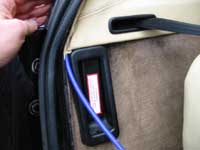
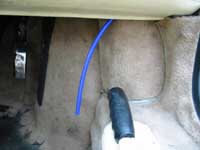
To clean up the install. I drilled a hole in the plastic casing and passed the hose through. Remember you can't squash the hose, as this will effect your boost reading. Once the hole is drilled, pass the hose through the plastic casing and then on through to the cabin. You can then replace the plastic seatbelt casing, making sure you've left enough hose to reach the black and white hose coming into the rear of the compartment (see pic at end of guide).
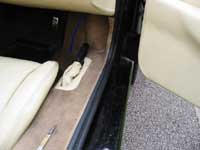
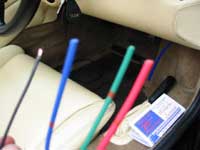
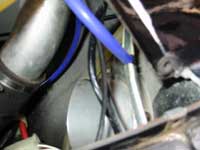
Inside the cabin you'll need to run the boost hose to the drivers footwell. I peeled back my carpet and door seal to run the hose concealed to the footwell. The hose is quite thick, so I had to pull the carpet back and push the hose deep into the side of the Esprit. It takes a little time to run the hose concealed, but I think it was worth the effort to give a really clean install. You can see the hose where the arrows pointing, hidden underneath the carpet.
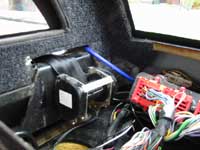
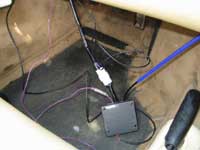
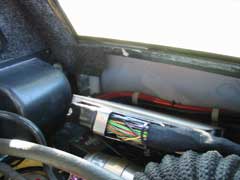
Once the hose is in place and before connecting it to the Esprit hose. It's time to wire in the control unit. This comes with one purple wire attached to it and a cable. Because the Turbo Timer is Japanese and the Esprit isn't, they don't supply the connections to just plug into the ignition, so we'll have to hardwire it in. This will involve connecting up 5 wires in the right place.
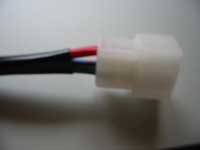
Connect the cable to the control panel (only one end will attach). Now you know which end not to cut. Cut the connection box off the other end. This will leave you with a Red, Blue and Green wire, along with the two Black wires that are attached to the cable. You only need to use one of these black wires, so either cut the other short, or as I did, feed it up the black covering. You can now unattach the cable from the control unit and we can look at wiring it into the ignition.
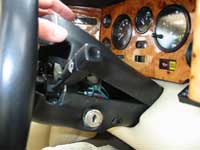
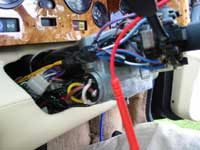
Remove the cover from around the steering column. Two screws either side hold the top piece in and one larger screw underneath holds the bottom piece in. You will be greeted by many wires. You will need to find a permanent live, ignition live and accessory live from the ignition and an earth. To find these it is useful to have a multimeter. I bought one for this install for £12 from Frost Auto Restoration Techniques.
I used the earth from the stereo to earth both the black wire and purple wire. I used a connection box to connect these to the earth the stereo is using (or was before I took my stereo out). I cut the forks off the end of each wire as you can't earth to the body of an Esprit.
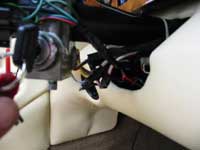
To find the 3 different lives you need is easy. Set the multimeter to DC 20 volts. Use the black and red leads from it to touch each wire to find out if it's live. You'll need to touch the black one to the earth you're using and the red one to the wire you are testing. Firstly leave the ignition off. Once you find 12v, you know that's the permanent live. Next turn the ignition on one turn. This is the accessory live. Once you've found 12v again, check it by turning the ignition off. It should now read 0v. Finally turn the ignition to the second position and do the same, this is the ignition live. I found the Red wire to be permanent, the yellow to be accessory and white ignition live off my ignition.
You can now attach your wires to the different lives. Red is permanent live, Blue is accessory live and Green is ignition live (listed in manual). I used connection boxes, but you could strip back the wire and use a soldering iron. As I said before the purple and black need to be earthed. The purple should go to the handbrake light, but this is a waste of time in my opinion. It's supposed to stop the system working if the handbrakes not on, but I've hardwired it so it works all the time.
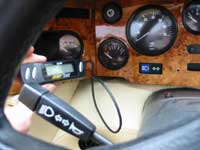
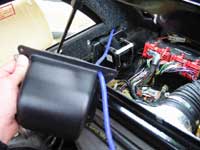
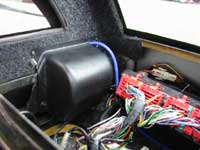
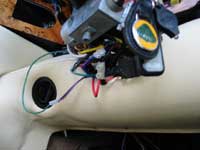
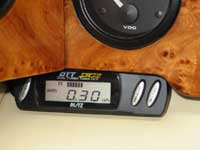
Now you can attach everything together. Use the straight connection piece to attach the hose coming from the control unit to the Boost Hose. Connect the cable you've just wired and the Display to the unit. Where you locate your display is up to you. I've located it just below the oil temp gauge, so I can see it easily while driving.


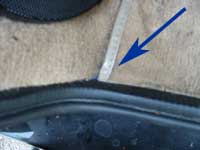
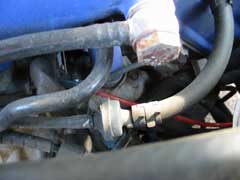
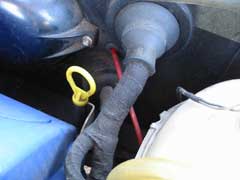
You can now connect the boost hose to the hose using the T-piece. The yellow arrow shows you the hose you need to cut into. Follow it to a place convenient for you to attach your new hose. I've done it behind the panel. Cut the hose and reconnect it using the T-piece, you can now attach your boost hose to it.
The Turbo Timer is now fitted. You'll need to check everything's working ok before replacing and tidy everything up. The Turbo Timer will switch on once you have turned the ignition to the second position. If you hose has a leak or isn't connected properly, you'll lose boost, so check it carefully.
LEW's Verdict
Once we'd opened the kit, we thought the install was going to be a real pain. The instructions weren't what I'd call detailed and Dermot had told us the hose wasn't long enough. We thought we'd bitten off more than we wanted to chew. After calling Race Logic about the connections, we felt a little better about the install.
Now it's done, it wasn't bad at all. Running the hose through the Esprit was fairly simple and the wiring is easy once you know which wire goes where. We're very happy with the install as it's very unintrusive with the only clue it's there being the display itself. Total time was around 3 hours, but as usual, we weren't close to straining ourselves. Could be done in a couple of hours easy.
Now you know how to install it, you need to know what it's like! Read LEW's review and how to order one of your own.
Feel free to e-mail LEW with your opinion on this guide and we can add it to this page. admin@lotusespritworld.com
See the Turbo Timer Review here
![]()
V8 Installation
Installation on a V8 engine is basically the same as the 4 cylinders. The boost hose (seems to be red on V8's, black & white on 4 cylinder) that needs to be cut into with a T-piece runs from the rear of the engine (back of the Esprit) and into the left-side self, as the 4 cylinder does. You can cut into this red hose at the same place as the 4 cylinder. The rest of the installation should be the same.
|
|