
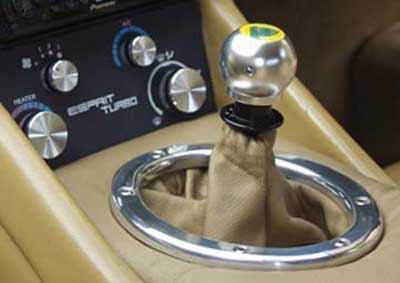
Alloy Gearshift Surround
The 1999 Esprit Sport 350 started all this off, when Lotus added an Alloy Gearshift Surround as standard, along with an alloy gearknob. These are available from Lotus as an aftermarket item and a few Esprit owners have fitted them to their cars. But with a price of over £130, they're not cheap! Also reports suggest that quality and fitting is poor. After the success of Alan Paterson Door sills, he has now turned his attention to producing a quality gearshift surround. Now you can buy one that has been designed to fit properly at a more reasonable price.
See how it was designed, then how to fit it and finally how to order. I will also give LEW's Verdict as usual.
Design Process
Objectives
To produce a high quality, polished alloy gearshift surround at an affordable
price that would provide a good fit to the centre console without the requirement
of modification to the panel. An alternative fitting method to be incorporated
in the design. Small batch production a major consideration as is control
of prototyping and set up costs.
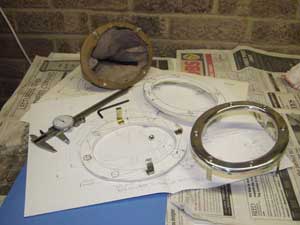
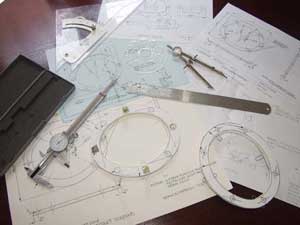
Design method
The polished alloy gearshift surround was not copied from the Lotus one
as apparently it’s not a good fit.. Dimensions were taken from the gaiter
ring and centre console of my car as a starting point. An engineering drawing
was produced (4 years Day Release on the HNC Mech Eng course at Falkirk Tech.
have not gone to waste), then a polyboard model prototype was made. This was
tested for fit on my centre console, found to be not wide enough so the drawing
was altered. A second polyboard model was produced and again tested for fit.
Success.
Production Technique
Various production techniques were investigated. Laser cutting was the
cheapest but it’s only a vertical cut, then nobody could cut the rads
on the top edge of the ring. Investment casting was considered but rejected
because of the high cost of making a wax injection mould. In the end, good
old CNC milling was the chosen method as the prototyping cost was affordable
and while the unit cost was high, it allowed for small batches to be produced.
Also I found I could talk to the Engineer who operated the mill and he preferred
hand drawings to CAD/CAM. I was an Engineer 20 years ago – and so was
he. I was also present while the prototype was being machined out of the alloy
plate. I was concentrating on making sure everything was right – and
forgot to take the camera. Maybe during the production batch. The ring was
then sent to the specialist metal polishers.
Installation
This isn't going to be the most difficult job you attempt on your Esprit, but just so you do it properly, I'll show you how it's done. Should only take 20-30 minutes.
The alloy gearshift surround is secured to the centre console by means of 6 off M6 x25mm button head socket screws, matching washers & nuts to provide a tight, flush fitment. It may be possible to achieve a satisfactory result by only using 2 full length screws fitted in the North & South positions of the ring, then cutting the remaining 4 screws short and fitting them as dummy heads using silicone sealant. 6 full length screws are supplied, allowing the user this option.
|
You will need the following parts: Alloy Gearshift Surround |
You will need the following tools: 8mm Socket |
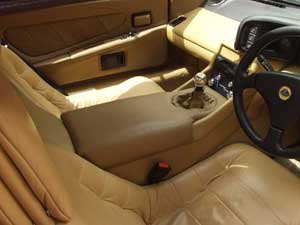
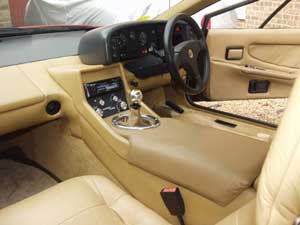
Left: Take one Stephens Esprit. My car has had the centre console retrimmed and ‘plumped up’ a bit so it’s more comfortable to lean on. This has the effect of making it look a bit ‘stretched near the gaiter. One day, I’ll retrim it using thinner foam – but not today.
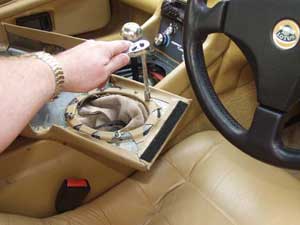
Right: To remove the centre console, gently pull forward the back edge and remove the locating tab from underneath the bin on the rear firewall. Take care not to scuff the leather in so doing.
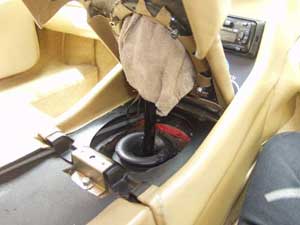
Left: Tilt the panel up at an angle and you will see that the front edge is held in place by a length of Velcro (very High Tech in the 1980’s). You will also see that the leather gaiter is tightened by a piece of knicker elastic which should be tied in a pretty bow. Untie this and ease the gaiter over the head of the gearknob. Separate the Velcro on the front edge and carefully lift the panel away from the mounting area – again, watch that leather!
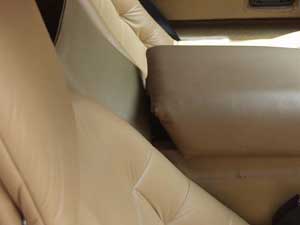
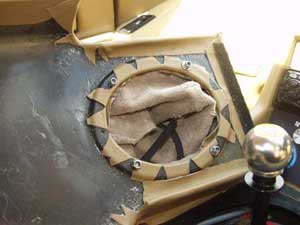
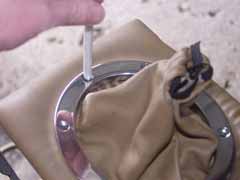
Right: Here you can see that the gaiter is clamped to the centre console by 4 nyloc nuts and washers. Above the console, there is a thin metal ring with 4 studs in it. The leather gaiter is stretched over the ring, the studs pass through 4 holes in the gaiter and then through the centre console panel itself.
Left: Use an 8mm socket to undo the Nyloc nuts. Right: The nuts have been removed and the studs are visible. Now pull the gaiter away from the centre console, being careful that none of the studs snag or catch on the leather trim.
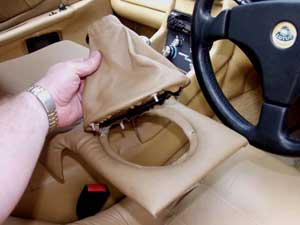
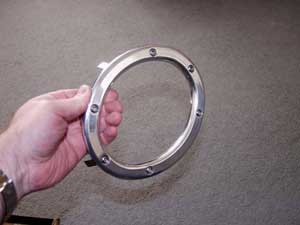
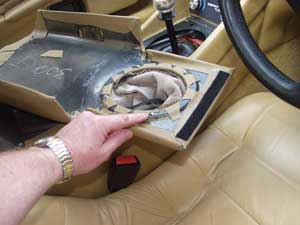
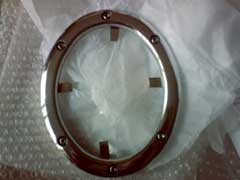
Left: The gaiter has now been removed from the console. Right: Take hold of your newly acquired polished alloy gearshift surround. Pause to admire it’s lustrous beauty.

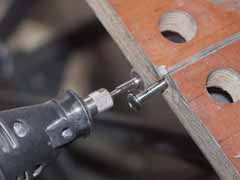
Left: Lay the alloy surround on top of the gaiter ring and mark the positions of the holes with a felt tip pen. Right: Drill out the holes using a 6mm drill bit, then lay the alloy surround on top and push the screws down through the holes.
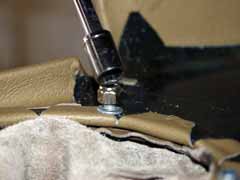
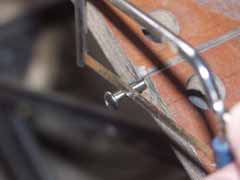
Left: Below the console, fit the washers and nuts to the screws and tighten with a socket or spanner until you have a flush fitting alloy surround. Centre: You may wish to only fit 2 screws in the North & South positions, then cut the remaining screws short with a junior hacksaw and fix the dummy heads in position with silicone sealant. Right: Alternatively you could cut the screws short with a Dremel type mini drill fitted with a cutting disc.

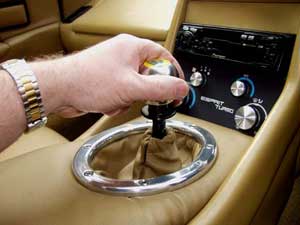
Before & After: Refit the panel to the car, which is a reversal of steps 1-3. Take care not to damage your leather while refitting. Don’t rush it, a little more time spent will save this from happening. Remember – The sour taste of poor quality remains long after the sweetness of meeting the deadline has been forgotten.
Polish off the fingerprints with a soft cloth – Et Voila! The gearshift surround should fit all cars from 1988-1996 ( which is when Lotus changed the design of the interior. Several people with cars up to 1999 V8 have bought a surround and I have had no complaints.).
Ordering
Sales
The polished alloy gearshift surround will be on sale at £85
+ £8 P+P in the UK. Currently OUT of STOCK
Overseas orders will be accepted via Paypal, but customers should enquire for precise shipping costs by email: alan.paterson5@ntlworld.com
Payment
Orders from outside the UK are now being taken and a paypal account has been set up. Email Alan for details on how to pay and delivery costs to your country.
To place an order you can either email alan.paterson5@ntlworld.com or telephone on +44 (0)1252 663064. Payment will be by cheque or paypal with delivery will commence two weeks after ordering.
Cheques payable to Alan Paterson to be sent to 13 Littlefield Close, Ash, Aldershot, Hants, GU12 6TH United Kingdom
LEW's Verdict
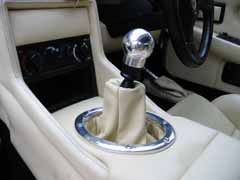
As you can see from the design that's gone into this project, it's going to be a quality product. I've always wanted one of these, but the cost was always to high for what it is. The price of this one is more reasonable and a lot more thought has gone into it. I'll be ordering one. Alan's producing only as many orders as he gets. So get yours ordered. I'll be getting a alloy gearknob as well (from Lotus), which together with the surround, should give that 350 feel.
Lotus Esprit World has taken delivery of it's Alloy Gearshift Surround from Alan Paterson. As usual everything is extremely professional, from the packaging to the instructions. You don't get that sort of detail with most parts you buy. Fitting was easy, although I did manage to break one of the clips off. But a bit of superglue later, all was well. Only took about 15 minutes following the guide and looks great. I've very happy with mine and have just order a GT3 alloy gearknob to finish the look off. Money well spent.

This mod was performed & supplied by Alan Paterson on his MY88 Stephens Esprit Turbo.
![]()
If you try this, feel free to e-mail me with your Verdict at kato@lotusespritworld.com
|
|